Showing posts with label Linux. Show all posts

Saturday, 26 September 2015

// // Leave a Comment

Gryffin a open-sourced Web Security Scanning Tool by Yahoo


Gryffin, the new project has been published to Github in beta under the BSD-style license, and Yahoo! says that it is more than just another scanner, as it aims at addressing two issues that current initiatives have, namely coverage and scale.

Gryffin's crawler also uses PhantomJS for DOM rendering and navigation, which allows it to discover links and code paths in rich applications that are heavily driven by client-side JavaScript. However, the scanning platform does not have fuzzer modules, even for common vulnerabilities like XSS and SQL Injection, as it wants to allow users to fuzz for just what they need.

While every such platform aims to achieve low false positive rates, Yahoo also desired to provide a broader coverage and an elastic infrastructure.

Gryffin has been released as a standalone package, but Yahoo! says that it is actually build for scale, on the publisher-subscriber model. The platform’s components are either publishers or subscribers, or both, which allows it to scale horizontally by adding new nodes to it.
Read More

Tuesday, 12 May 2015

// // Leave a Comment

11 Must Installed Utilities To Supercharge Your Ubuntu Experience

Whether you’re a relative novice or a seasoned pro, we all want to get the most from our operating system. Ubuntu, like most modern OSes, has more to offer than what is presented at first blush.
From tweaking and refining the look, behaviour and performance of the Unity desktop to performing system maintenance, there are a huge array of useful utilities and apps that can help tune Ubuntu to meet your needs in no time.
Caveat time: Ubuntu has always shipped with ‘sane defaults’ — options that just work — out of the box. These defaults are well suited for the majority of people. They’re tested, accepted and recommended.
But one size doesn’t fit all. For the tinkerers and experimenters among us the default experience is a starting point from which to tailor.
So, without any more waffle, here is a set of 11 nifty utilities to help you supercharge your Ubuntu experience.

Unity Tweak Tool

unity-tweak-tool
I’ll kick off this list with the big one: Unity Tweak Tool. The kitchen sink of customisation, Unity Tweak Tool offers a comprehensive set of system tweaks tuned for Ubuntu and the Unity desktop.
It’s stuffed full of switches, toggles and control, letting you configure everything from the way Unity looks to the way it behaves. Use it to quickly and easily change the GTK theme and icon set, set up hot corners, adjust launcher size, add or remove workspaces, and — notably —  enable Unity’s elusive ‘minimise on click’ feature.
Free and readily available from the Software Center, Unity Tweak Tool is one well worth keeping in your back pocket.

Unity Privacy Indicator

indicator-privacy-in-ubuntu
Privacy. A big, big issue and rightly so. But the topic is often shaded rather than binary; you may be happy to let some data or habits, say apps you frequently open, be logged locally, but not be ok with the searches you make in the Dash being ferried to a third-party server (however anonymous that data may be).
Privacy Indicator is a useful tool to help you stay abreast of what files, folders and services are being accessed, logged and recce’d on the Ubuntu desktop.
With a quick click on the ‘eye’ icon added to the desktop panel you can:
  • Toggle Online Search Results, Zeitgeist, HUD Logging & GeoIP
  • Quick access to clean Zeitgeist, F2, Recent Files, etc.
  • Options to show/hide desktop icons and name in the panel
The latter two options may seem a little misplaced in this app but have less obvious privacy implications for those who take screenshots or screen share.

Unity Folders

unity folders
Android, iOS, OS X, Chrome OS, and GNOME Shell have app folders, and so can Unity with a nifty third-party app. 
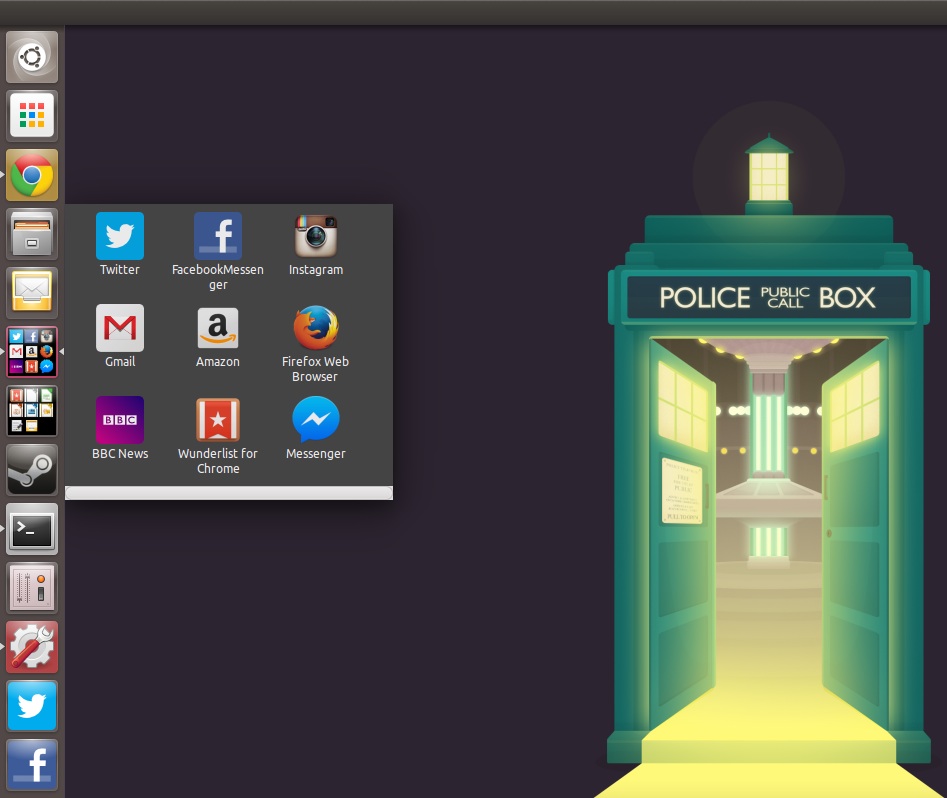
“Unity Folders” allows you to organise apps on the Unity Launcher into handy folders — think ‘games’, ‘office’,‘social‘, etc. You get quick access to your favourite apps without needing to open the Dash, which may suit your workflow.
Each ‘folder’ is, actually, an application that opens up and positions itself near the origin point. But the overall effect is one that looks like an OS X style stack or an Android folder popover.
Folder icons can be customised or auto-generated based on the applications tucked up inside. Existing folders can be edited, rearranged, rename and re-other stuff, too.
  • Create as many folders as you like
  • Choose custom or auto-generated folder icon
  • 3 folder layouts to choose from
  • Set custom icons for apps added to folders
  • Edit existing folders

Caffeine

A staple for many of us, and not just in our drinks, Caffeine offers a fast, silent way to stop your screensaver or lock-screen kicking in. The degree of usefulness will depend on your circumstances (read: quirks of your system), and though it’s not quite as user friendly as it once was, it’s still worth checking out.

System Monitor Indicator

multiload-indicator-in-ubuntu
If you’re a stat hound who likes to keep tabs on apps, processes and hardware status, Linux makes it easy. From Conky Configs to Terminal Commands — there’s no shortage of ways to monitor your CPU usage, network traffic or GPU temperature.
But by far my favourite is System Monitor Indicator – also known as indicator-multiload — available from the Ubuntu Software Center. It has a host of configuration options, too.

Power Saving Tools for Linux Laptops

Zareason Ultrabook Front

TLP

Linux distributions don’t have the best reputation when it comes to power efficiency on portable devices.
If your own Linux laptop can barely get you from the sofa to the kitchen before needing a recharge, there are some tools you can try.
TLP is one of the most popular automated background tool promising to prolong battery life of laptops running Linux. It does this by adjusting the settings and behaviour of system processes and hardware, such as enabling Wi-Fi power saving mode, runtime power management of PCI bus devices, and processor frequency scaling.
It’s available to install on Ubuntu 14.04 LTS and later using the dedicated TLP PPA and comes with a ‘catch-all’ config to get you started. The more advanced users among you can dive in and manually adjust the settings to suit your own hardware, something that a thorough guide on the TLP wiki makes easy.

Laptop Mode Tools

If TLP sounds a little too complex — and there’s no shame if it does — there’s a simpler alternative: Laptop Mode Tools. This package is available to install from the Ubuntu Software Center and keeps the tweaks made to a set of sane defaults (Wi-Fi, Bluetooth, etc.).
Laptop Mode Tools cannot be installed at the same time as TLP.

Intel Graphics Installer

intelgraphicsdriverinstaller
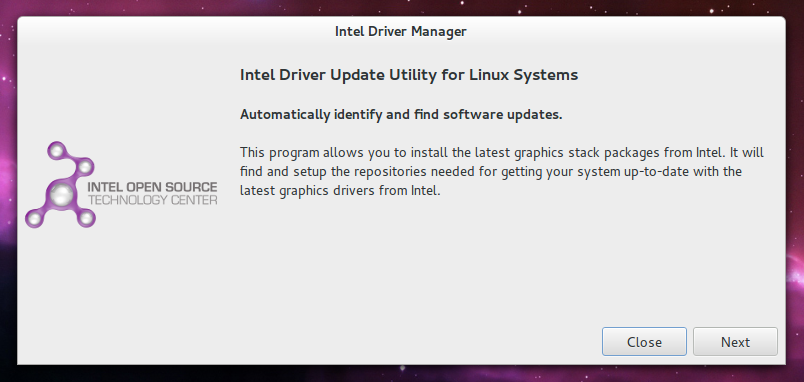
The Intel Graphics Installer tool is a must-have for those running Intel graphics hardware who want the best performance they can get. It makes finding and installing the latest Intel GPU drivers a painless, fuss-free affair — no PPAs or Terminal kung foo needed.

Hardware Stats

iNex features
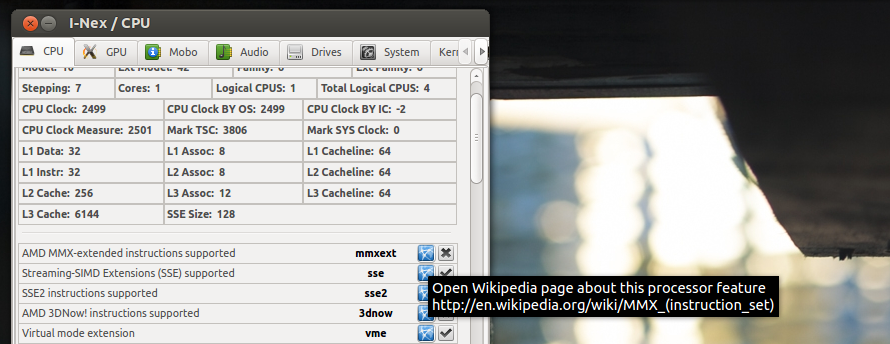
If you plan on upgrading your PC or replacing a worn-out part you’ll need to get some specific hardware details, such as RAM type, CPU socket set or what PCI slots are available.
I-Nex makes unearthing this, and host of other detailed system stats, easy.  Use it to find your motherboard model number, RAM stepping, S.M.A.R.T. status and…well, pretty much anything else you can think of!

Disk Space Visualizer

disk-usage-visualizer-for-ubuntu
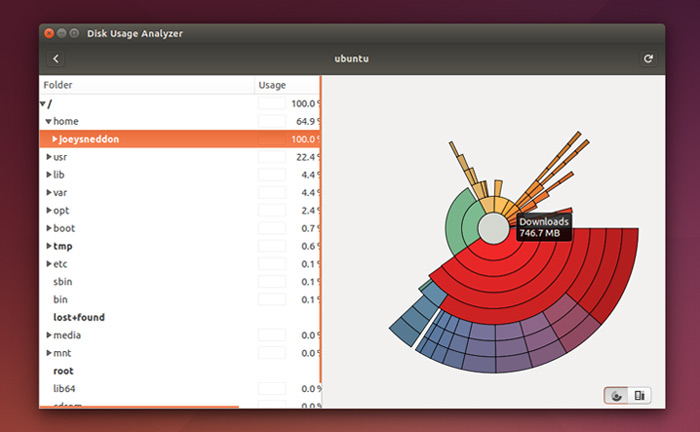
In this age of 1TB hard drives we might not need to be as prudent with disk space as we once were. But for those of using a smallish SSD, running multiple partitions or working in a virtual machine with a fixed-size virtual disk, there’ll be times when freeing up a bit of extra space is required.
GNOME Disks, installed in Ubuntu by default, makes finding the biggest space-gobbling culprits easy. Ideal for locating hidden logs, caches, and media files.

BleachBit (Cruft Cleaner)

bleachbit
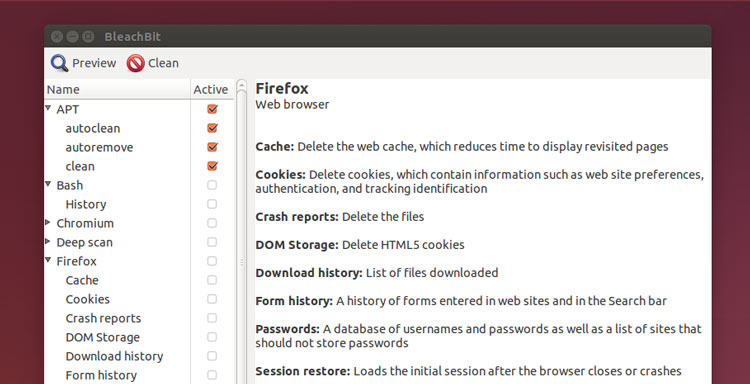
Windows users will be familiar with applications like CCleaner, which scan for and clean out junk files, empty folders, bloated caches, and obsolete packages. For a a similarly quick and effortless click n’ clean solution on Ubuntu try BleachBit.
It is a powerful tool, so do pay attention to what you’re cleaning. Don’t aimlessly check every box; not everything that it can clean needs to be. Play it smart; when in doubt, leave it out.
Got a favourite system utility of your own? Let others know about it in the comments Section below.
Read More
// // Leave a Comment

How To Remove Anchor Icon from Docky


  • Press ALT + F2
  • Type command “gconf-editor” and hit enter/return
  • Navigate to “apps/docky-2/docky/items/DockyItem” in the gconf-editor
  • Uncheck “ShowDockyItem”
  • Restart Docky
Et voilà! Anchor free Docky!

Terminal way

If you’re lazy and want to do this via the terminal you can do so using the following commands. (Thanks to commenter dRewsus)
This command will turn the icon off:
gconftool-2 --type Boolean --set /apps/docky-2/Docky/Items/DockyItem/ShowDockyItem False
And this one back on:
gconftool-2 --type Boolean --set /apps/docky-2/Docky/Items/DockyItem/ShowDockyItem True
Remember that you will need to restart Docky to see the changes take effect.

Read More
// // Leave a Comment

How to Install Android Apps on Ubuntu using ARChon

Google recently announced the first set of Android apps available to run natively on Chrome OS, a feat made possible using a new ‘Android Runtime’ extension.
Now, a developer has figured out a way to bring Android Apps to Chrome on the desktop.
Vlad Filippov‘s chromeos-apk script and ARChon Android Runtime extension work hand-in-hand to bring Android apps to Chrome on the Windows, Mac and Linux desktop.
android apps on linux
IMDB, Flipboard and Twitter Android Apps running on Ubuntu 14.04 LTS
Performance of apps through the runtime is not fantastic. Any ambitions of running Dead Trigger 2 or other graphically intensive games should be put to one side.
Similarly, being both an unofficial repackaging of the official runtime and running outside of Chrome OS, system integration (e.g., webcam, speakers, etc.) may be patchy or non-existent.
The guide that follows is provided as-is, and without any guarantees of success. It should be considered highly experimental, buggy, unstable – possibly even flat out evil. Try it out of curiosity rather than heightened expectation and you should be fine.

How to Run Android Apps on Linux

To run Android apps on Linux through Chrome you will need, obviously, to install Chrome. Version 37 or higher is required. Honestly, if you’re going to be playing with a potentially unstable hack then you might as well download and install the unstable version of Google Chrome for Linux, too.
Already got a version of Chrome installed? You can install the Dev Channel version via the command line by running:
sudo apt-get install google-chrome-unstable
Next you need to download the custom-made — ergo officially not endorsed by Google or Chromium — Android Runtime created by Vlad Filippov. This differs from the official version in a number of ways, the chief being it can be used on desktop versions of the browser.
Once the runtime has fully downloaded you will need to extract the contents from the .zip files and move the resulting directory to ~/Home. 
Now to install ARChon. Open Google Chrome and click the hamburger menu. Navigate through to the Tools > Extensions page and, near the top, check ‘Enable developer mode’.
Finally, click on the ‘load unpacked extension’ button and select the folder you previously placed into ~/Home. 
chromeos-apk-extensions
The Runtime alone doesn’t do much by itself so you will need to create a compatible package from an Android app.
There are several ways to do this: either manually, on your desktop, or using a free Android app. We’re covering the manual method below, but OMG! Chrome! has a great walkthrough of using a desktop app called ‘Twerk’, and theArchon Packager tool for mobile.

The Manual Way (Not Recommended)

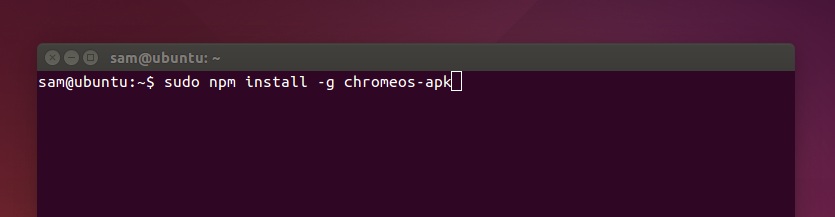
To convert APKs manually — something you really don’t need to do any more if you use one of the apps mentioned above — you will need to install the ‘chromeos-apk’ command line JavaScript utility. This is available to install through the Node Packaged Modules (npm) manager.
To do this first run:
sudo apt-get install npm nodejs nodejs-legacy
Ubuntu 64 user? You’ll want to grab the following library, too:
sudo apt-get install lib32stdc++6
Now run the command to install the script itself:
npm install -g chromeos-apk
Depending on your configuration you may need to need to run this latter command as sudo. If you’d prefer not to install npm modules with sudo, you can do so with some jiggery-pokery.
chromeos-apk-npm
Now you’re in the home straight. Head over to Google to find an APK of an app you want to try out, bearing in mindnot all Android apps will work, and those that do may be unstable or lack features.
Place your wanted Android APK in ~/Home, then return to Terminal to convert it using the following command, replacing the APK name with the one you want:
chromeos-apk replaceme.apk --archon
The command will take a few seconds to do its thing. Maybe have a blink. Actually, don’t blink. 
chromeos-apk-archon
You now have an ARChon-rocking Chrome APK extension-y folder-y thing waiting in your Home folder. All that’s left to do is install it to see if it works!
Head back into the chrome://extensions page, tap the ‘load unpacked extension’ button once again but this time select the folder the script above created.
The app should proceed to install without issue, but will it run without issue? Open the Chrome App Launcher or Apps Page and launch it to find out.

Going Further

Since the ARChon runtime supports an unlimited number of Chromified APKs you can repeat the process as many times as you like. The Chrome APK subreddit is keeping track of success/failures, so if you’re feeling helpful be sure to post your findings there.
Read More